
Custom Dining Tables for Builders and Interior Designers in Park City: A Coordination Checklist
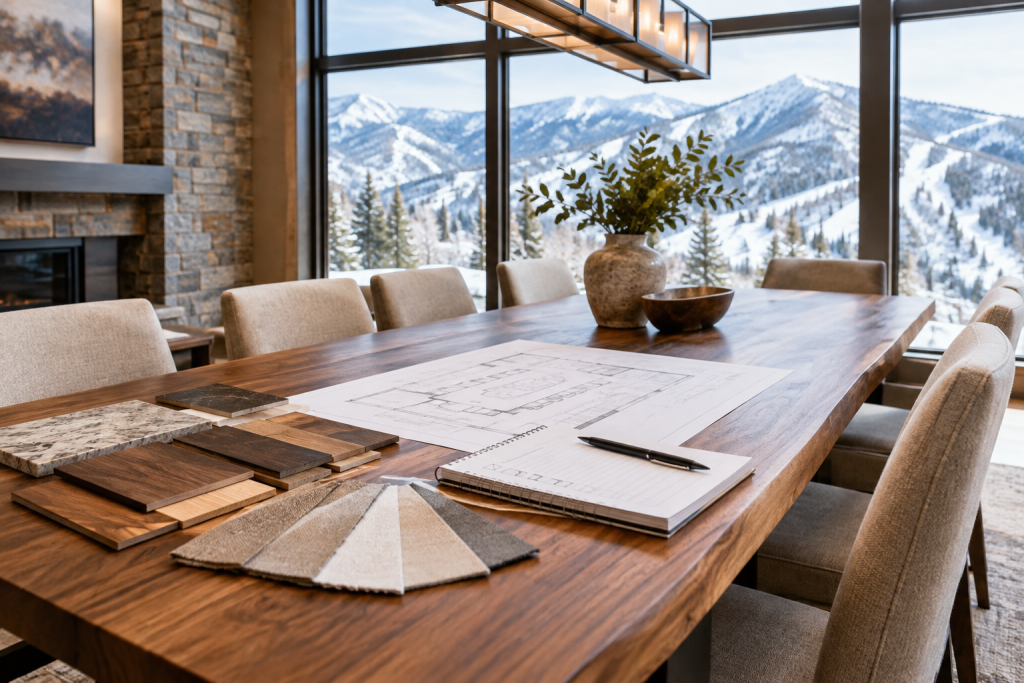
Custom dining tables for builders and interior designers in Park City need to be coordinated like any other substantial furnishing: early enough to influence the room, specific enough to avoid assumptions, and practical enough to arrive through the available access route.
That does not mean every detail must be finalized before the design conversation begins. Park City Tables can start with a room photo, approximate dimensions, desired seating capacity and examples of tables the client likes. The goal is to turn those early ideas into a usable specification for the homeowner, design team, builder and delivery contact.
Use the checklist below when a dining table is part of a larger home project in Park City, Deer Valley or the Wasatch Back.
1. Establish the table’s role in the room
Before selecting a species or base, clarify how the table will be used. Is it mainly for everyday meals, large family gatherings, occasional entertaining, or a combination of all three? A second home or vacation property may need a different balance of daily flexibility and group seating than a primary residence.
Record the intended number of diners, the preferred seating arrangement and whether benches are being considered. Also note whether the table will sit in a dedicated dining room, an open kitchen, a great room or another shared space. These details affect the proportions that will feel comfortable rather than simply filling the available floor area.
Project notes to gather
- Target number of people to seat regularly and occasionally
- Preferred table shape and orientation
- Chair widths, armchairs or bench dimensions
- Nearby doors, islands, fireplaces, walls and circulation paths
- Whether the table should read as rustic, refined, modern or more distinctive
- Whether engraving or another personalized detail is part of the brief
For additional design references, the custom table gallery can help the team compare silhouettes, wood character and base approaches. Gallery images are inspiration for custom builds, not a statement of current inventory.
2. Confirm dimensions before the furniture specification
“Fits the room” is not a complete table specification. Document the room dimensions, the proposed table dimensions and the clearance around every side. Include the width of chairs, the location of legs or pedestals, and the movement required to pull chairs out and walk behind seated diners.
Builders and designers should also check the relationship between the tabletop and fixed elements. A table may technically fit between two walls but still feel awkward if a chair conflicts with a door swing or if the base lands where a guest needs to sit.
When seating capacity is important, discuss it directly rather than relying on a generic size label. The final arrangement depends on table length and width, chair size, base placement and how much personal space the project requires. A custom-sized table can be planned around those conditions instead of forcing the room into a standard retail dimension.
It is useful to send a simple plan, marked-up photograph or sketch showing the proposed location. Completed furniture plans are not required to begin the process, but better information usually produces a more useful first conversation.
3. Select the collection and material direction
Park City Tables offers two broad planning paths. The Standard Collection uses established designs and more readily available lumber for a simpler, more predictable custom-table process. Options may include farmhouse, trestle and modern hardwood designs.
The core Standard Collection wood choices are Douglas fir, alder, maple, white oak and black walnut. Each gives the room a different visual direction, so the selection should be made alongside the cabinetry, flooring, wall treatment and upholstery rather than in isolation. There is no universally best species; appearance, grain, hardness, finish, cost and overall style all matter.
The Specialty Collection is intended for more individualized projects. It can include live-edge slabs, epoxy river tables, oversized tables, unusual dimensions, distinctive slab character, unusual bases and more individualized material sourcing. A specialty project may require finding an appropriate slab or hardwood specifically for the table.
For a clearer comparison before the team presents options to the client, review the guide to custom table wood options. If a live edge or epoxy direction is under consideration, it is also helpful to separate the structural requirements from the visual decisions, such as slab character, epoxy color and edge treatment.
4. Specify the base, finish and details
The base is both a design element and a coordination item. Record the preferred base style, the number and location of supports, and how it relates to chair positions. Trestle and farmhouse bases may create a different seating experience from a more modern hardwood design. A custom base may also be appropriate when the table has an unusual length, width or weight.
The finish should be reviewed as part of the material sample discussion. Ask what level of sheen and color the design calls for, and how much natural grain or character should remain visible. If the table is intended to complement existing wood, identify whether the goal is a close match, a deliberate contrast or simply a compatible tone. Final finish choices should be confirmed against the actual project palette where possible.
Optional details belong in the specification, not in a late email. Engraving may include a family name, meaningful date, coordinates, monogram, company logo, short inscription or custom artwork. Placement can be on the tabletop, apron, base, end, underside or another suitable location depending on the design. Simple custom engraving currently starts at $195; more complex engraving and artwork are quoted individually. Review custom table engraving before approving artwork or placement.
5. Create a written approval package
A concise approval package can prevent the classic project problem: everyone remembers a slightly different table. Include the following in one shared document or email thread:
- Overall length, width and any unusual dimensions
- Target seating capacity and chair or bench information
- Wood species or specialty material direction
- Edge profile, slab character or epoxy requirements, if applicable
- Base style and placement
- Finish direction
- Engraving text, artwork, location and approval status
- Delivery address and intended room
- Primary client, builder, designer and delivery contacts
- Required access information and a target installation window
Use “approved,” “pending” and “not applicable” rather than leaving blank fields. A blank field invites a guess, and furniture is a poor place for guessing—especially when the guess involves a staircase.
6. Plan the route before production is too far along
Large furniture should be planned around the route it must travel, not only the room where it will end up. Measure exterior doors, interior doors, turns, stairways, elevators, landings and any narrow passage that could affect delivery. Note ceiling height and tight corners when the table will be carried or positioned in a finished space.
This is particularly important for oversized gathering tables, thick tops and specialty builds. If access is limited, discuss whether the base can be attached or assembled in the room. The delivery plan may also affect dimensions, construction details and the timing of other trades.
Park City Tables provides table delivery and setup in Park City, Deer Valley, Heber City, Midway and surrounding Wasatch Back communities. Delivery and setup can include bringing the table into the intended room, attaching or assembling the base when needed, leveling and final placement.
7. Assign contacts for remote or second-home projects
For a second home, vacation property or managed residence, identify who can answer questions when the owner is away. A property manager, contractor or other authorized contact may be able to coordinate access and installation, but that person should be named in advance and understand the approved specification.
Share the latest room photographs, measurements and access notes with the delivery contact. Confirm whether the room is ready, whether protective floor covering is needed, and whether other trades are still working nearby. The table should not be treated as a final-minute delivery if the room is full of tools, materials or temporary storage.
8. Coordinate the schedule using estimates, not promises
The current advertised target turnaround is approximately four weeks for Standard Collection tables and approximately eight weeks for Specialty Collection tables. These are estimates, not guaranteed completion dates. Materials, project requirements, specialty sourcing and approvals can affect the schedule.
For a broader project schedule, work backward from the desired installation window. Allow time for the client to approve dimensions, wood, finish, base and optional engraving. Specialty projects may need additional time for sourcing an appropriate slab or hardwood. Late changes can also require a fresh review of the quote and timeline.
The how custom table ordering works page can help the team organize the design conversation, approvals and next steps before the order is finalized.
9. Confirm the quote against the approved scope
Custom pricing depends on the actual dimensions, wood or slab, base, finish, delivery requirements and selected options. Standard Collection pricing currently begins around $2,195 for a 6-foot Douglas fir configuration, while some Specialty Collection live-edge configurations currently begin around $3,495+. These are starting points, not guaranteed final prices.
Before approval, compare the quote with the design package. Check that the size, wood, base, finish, engraving, benches and delivery expectations all match. The custom table pricing guide is useful when explaining why two tables with similar lengths may have different quotes.
Final handoff checklist
- Room dimensions and clearances are documented.
- Seating needs and chair or bench dimensions are confirmed.
- Wood, finish, base and edge direction are approved.
- Engraving text or artwork is final, if included.
- Access routes have been measured and shared.
- Delivery and installation contacts are assigned.
- The room will be ready for placement.
- The schedule and quote are understood as estimates and project-specific figures.
To request a custom quote from Park City Tables, send a room photo, approximate dimensions, the number of people you would like to seat and examples of tables you like. The team can help narrow the size, wood, style, base, finish and options for a Park City, Deer Valley or Wasatch Back project. Call 435-200-4982 or request a quote through ParkCityTables.com.